
Inbox has been one of the best email apps for many years. Now that Inbox has finally shut down, Google can finally focus on delivering a better experience on its main email manager, Gmail. And we won't have to wait too long to see those improvements. In fact, we have already seen one of the most important in action: scheduling the automatic sending of emails.
Until now this was a feature that we could only get through third-party applications or extensions such as Boomerang or IFTTT. Luckily, we can now schedule the sending of emails natively. Much more practical and elegant in terms of usability.
Gmail has even included new features that until now were exclusive to extensions such as the aforementioned Boomerang. As, for example, the possibility of mute conversations or set automatic reminders. In any case, Boomerang continues to offer unique features, such as the function of stopping the inbox or tracking messages. You can download it from HERE if you are interested!
With that said, let's get down to business and see how we can natively schedule automatic mailing in Gmail.
How to schedule the sending of emails in Gmail (desktop version for browsers)
The deployment of this new tool is being carried out in a phased manner. Therefore, if we still do not have it available in our Gmail or we do not see it, we may have to update the application (in the case of Android), or wait a few days for it to arrive officially on our device.
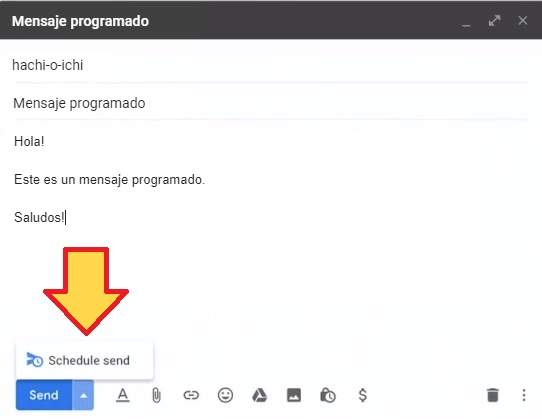
- Once we have activated this new functionality, the first thing we have to do is write an email as usual.
- Once we are ready to schedule the shipment, click on the drop-down tab that appears next to the button "Send”. We select "Schedule shipping”.
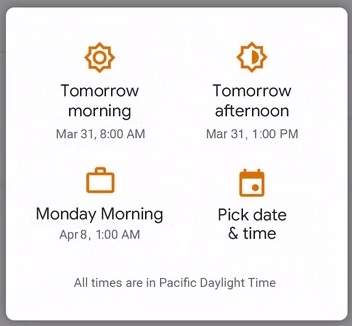
- Next, a new menu will appear with several preset shipping options, such as "Tomorrow morning"Or"Tomorrow afternoon”. We can also configure a date and time chosen by ourselves for sending the email.
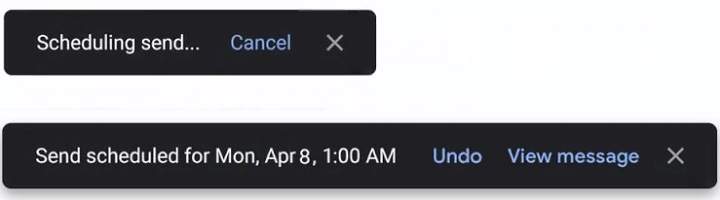
- Once the date is selected, we will see a message that says something like “scheduling delivery ...”. If everything went well, we will get a confirmation type "Scheduled delivery”.
At this point, if we want to change the date and time of the shipment, we can do it by opening the email again and repeating the same steps that we just discussed.
How to schedule automatic mailing in Gmail (Android)
Performing this task on Android mobile devices does not vary much compared to the desktop version.
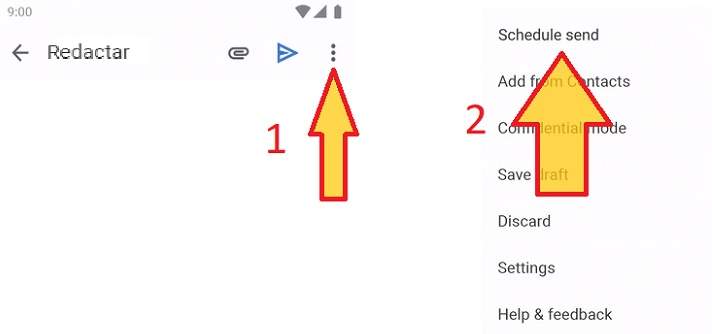
- First we write the email in question.
- Click on the menu button located right next to the send icon (3 vertical dots). A drop-down opens and we select "Schedule shipping”.
- As in the PC version of Gmail, we will see a new window with several delivery options. Of course, the system will also let us choose a custom shipping date and time.
- After this, a message will appear indicating that the shipment is being scheduled, and another confirming it definitively.
How could it be otherwise, here we can also change the delivery date by opening the email again and following these same steps.
In short, a new tool that gives the official Google mail manager a bit more character. A manager that, remember, was presented almost as "a great joke" against Hotmail in the famous April’s Fool of 2004, and that has ended up becoming one of the most used free mail managers on the planet.
You have Telegram installed? Receive the best post of each day on our channel. Or if you prefer, find out everything from our Facebook page.