Google Drive has more than one billion users. That means that if at some point Google's cloud storage service crashes or its servers stop working, many, many people would be left without access to all their documents. As unlikely as it may seem, this is something that already happened last January, when Google Drive suffered a loss of connection worldwide. The apocalypse?
Although it is not something that happens very often, we may want to have a backup copy of all documents, photos, spreadsheets and other files on hand so that we can access them offline from our computer. Thus, if some day an irrecoverable catastrophe occurs, we can continue to have access to all that data.
How to make a backup of our Google Drive documents
Some time ago we already saw a very useful tool with which to be able to map Google Drive as if it were a network drive in Windows, but with that trick we still need to have online access to our cloud account to manage and edit the documents. In this case, what we are going to do is use the application "Backup and Synchronization”, A kind of official Google Drive client for desktops.
With this utility we can not only synchronize all Google Documents, Presentations, Photos and Spreadsheets to access from the PC, but we can also open and edit them when we are offline. In this way, when we reconnect to the Internet - or Google Drive recovers after a crash - the edited documents will be automatically updated with the modifications made.
Step # 1: Install the Google Drive client for PC
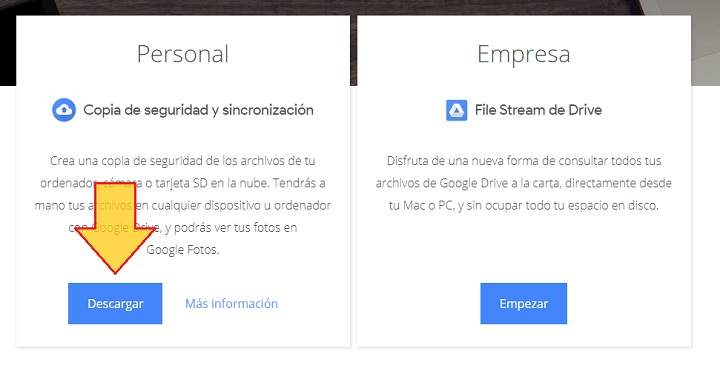
We can download the application from "Backup and Synchronization " for Windows from the Google Drive website HERE. At the time of downloading, we will select the option "Personal".
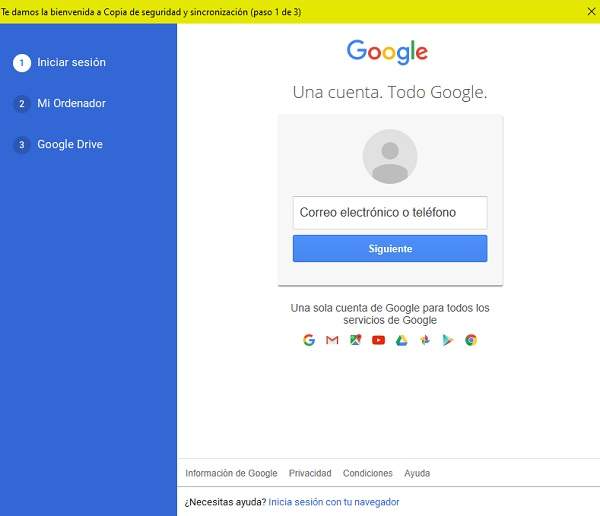
Once the program is installed, we open it and log in with our Google account.
Step # 2: Synchronize the files stored in Drive
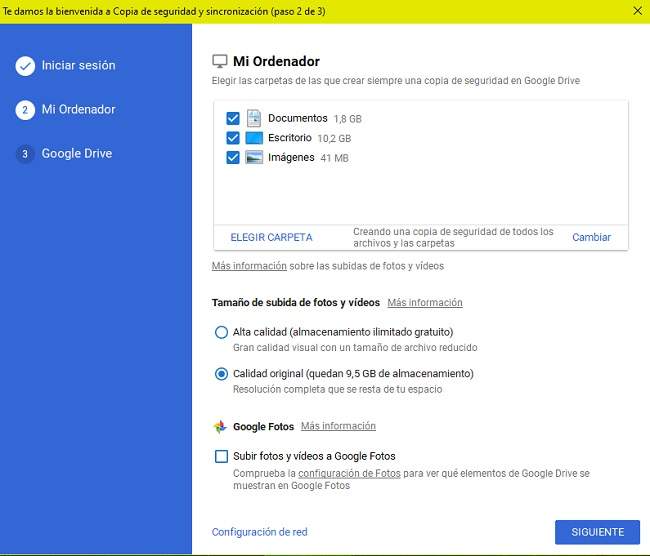
After validating the account, the system will ask us to choose which folders on our PC we want to synchronize so that they can be uploaded to Google Drive. This is an irrelevant step so in principle we can skip it (unless we want to make a backup of the photos and documents that we have on the computer, of course).
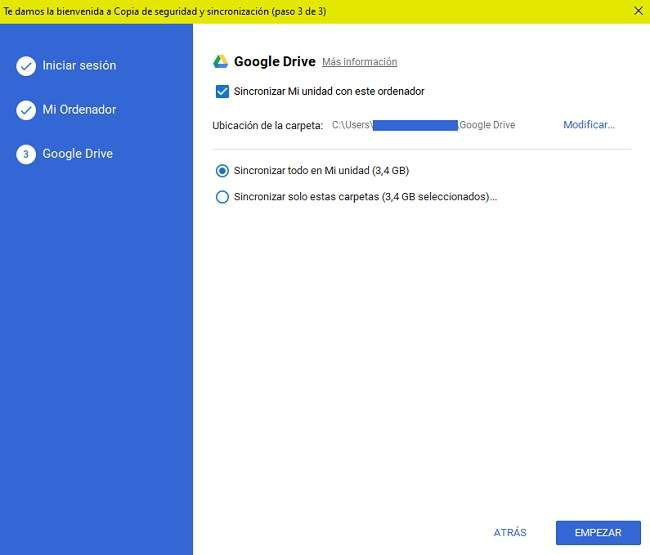
Next we'll get to the point where things get more interesting. Now the application will begin the synchronization process to bring the files that we have in the Drive unit and download them to the PC. Here it will give us the option to synchronize the entire unit or select the desired folders.
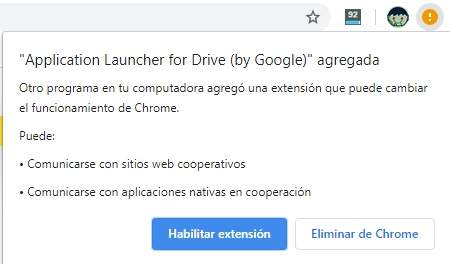
Note: If we have Google Chrome, an extension will also be installed so that we can edit all the documents from the browser without having to install any word processor on the computer.
Step # 3: Access and edit your Drive documents while offline
Depending on the size and volume of files, the synchronization may take several minutes. Once completed, we will see how a new folder appears on the desktop: if we open it we will see all the documents in our Drive unit. Perfect!
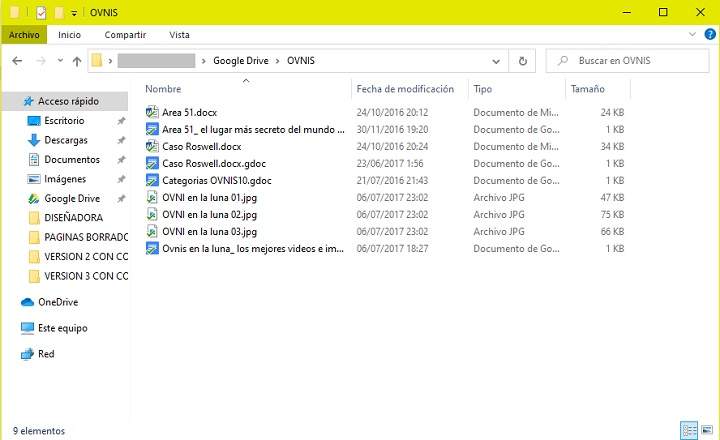
From here, if we open we click on any of the files we will access an offline version of the document, which we can edit and modify without having to be connected to the internet or to our Drive account. Once we are back online, the document will be updated in the cloud applying all the changes made.
Of course we can also take the opportunity to download any document individually, although if we want to do a massive download of documents it is best that we use another of Google's tools for these cases, called Google Takeout.
You have Telegram installed? Receive the best post of each day on our channel. Or if you prefer, find out everything from our Facebook page.